Since joining Pinterest, I've come across all kinds of fun things to try out, from recipes to nail art. One that particularly caught my eye was "galaxy" type nails, where you give your nails an ombre effect, going from light to dark. I wanted to try it out and obviously I knew I wouldn't get it to look this good (picture courtesy of spoki.lv via beautylish, click on the picture to go to the site):
Obviously I'm by no means a nail art expert, I just like trying different looks. So I have quite a few choices to use for this look, didn't realize I had so many shades of blue!
And I decided on using NYC's "Skintight Denim Creme" as a base, quick splotches of Sinful Color's "Gorgeous" over that, OPI's "Happy Anniversary" fine glitter and Sinful Color's silver glitter followed by a topcoat. And for the white dots for "stars", I used Nailene's tip pen but you can use any white. I think if I did it again, I wouldn't do the white dots.
Here's NYC's Skintight Denim Creme (one of my favorite shades!) with Sinful Color's "Gorgeous" splotched over it. Some sites say to use a makeup sponge but I just barely had any color on the brush and dotted around in random places.
Then the final look with the colors I used:
And a daylight shot since I took the other pictures last night and the light wasn't the greatest!
So for a first try, I'm actually pretty happy with how it turned out, though as I said, I probably wouldn't do the white bits next time.
Wednesday, December 7, 2011
Saturday, November 19, 2011
Just a PSA regarding the "Baby Polar Bear"
I've seen this picture passed around the internet for quite some time now and it's quite popular on Pinterest at the moment:
People claim that it is a baby polar bear, however it isn't! It's actually a very detailed little handcrafted bear made by a seller on Etsy. Had I not been on Etsy, I probably wouldn't have known where the picture originated. But I think this seller needs more exposure, she's super talented and you can buy the pattern to make the bear from Tatiana's Etsy shop here:
http://www.etsy.com/shop/TSminibears
And the direct link to the bear's pattern to see the listing in case she doesn't currently have it listed (she often sells out):
http://www.etsy.com/listing/52683885/miniature-bear-pattern-flocke-by-tatiana
You're welcome. ;)
Labels:
baby polar bear,
bear,
DIY,
etsy,
handcrafted,
handmade,
polar bear,
teddy bear
Monday, October 24, 2011
Candy Button Resin Necklace Project!
If you're a DIY-er like me, you're always seeing inspiration everywhere. I'm going as Katy Perry for Halloween this year, probably my most involved costume yet. I'm altering my costume (I got a white tutu and am putting sparkly dots on it) and making my jewelry. So if you want to make your own candy button jewelry too, here's how I did it!
Get your Candy Buttons (the kind on the white paper) and clean them up a bit, as they have a tendency to take some of the paper with them when you pop them off.
You'll want to seal the candies so they don't disintegrate in the resin and the color doesn't bleed. In an area with lots of ventilation, spray them with at least two coats of an acrylic spray, I used Krylon. Let dry between coats.
They'll move around a bit but make sure they're coated well!
Make sure they're completely dry, mix up your resin (I use Castin Craft's clear epoxy) and only fill your molds about 1/4 of the way full, just enough to cover the candies. Put your candies in the resin the way you want them. I wanted them to look just like the real thing so I went with the pink/yellow/blue situation. Let cure for as long as required, most require a day to cure.
Now for your final resin step, you can do this in many ways. You can use more clear resin in the last layer and put glitter in it, sprinkles, whatever you want! I used a resin type that cures white, just because I wanted it to look like the candies were on the white paper tape.
Additionally, I wanted some sparkle, so I used a glittery varnish over the piece.
And just because I wanted something fun on my own piece, I put little crystal hearts on the chain and made myself a ring too!
You can make these your own in so many ways, so as long as you have time (and the patience!), you can make tons of fun, unique pieces!
P.S., if you don't have the patience, I have one made up for you to buy in my Etsy shop!
http://www.etsy.com/listing/84580068/sweet-tooth-candi-button-resin-necklace
Thursday, October 13, 2011
A DIY Vintage Inspired Necklace!
I recently came across my grandma's old vintage rhinestone and crystal jewelry from the late 50's and 60's not long ago. I've been wearing the various necklaces a LOT and am now hunting for different colored pieces to complete my color spectrum. But what I really wanted was a piece with stones in different shapes, sizes and colors, which has proved nearly impossible to find anywhere online despite my constant search.
I considered making one and thought it would be impossible until I got myself into Michael's the other day and searched for supplies. I somehow found myself down the sticker aisle and found these great, vintage style stones, even in settings, in different shapes and colors! I then hustled back to the jewelry area and found clear rhinestone chain just like so many vintage pieces have, my only dilemma was how to attach said stones to the necklace.
Lo and behold, I found flatback head pins and figured I could glue the head pins to the stones then attach the stones to the necklace! Granted, this necklace is very lightweight in comparison to real vintage pieces but it serves my purpose and has gotten many compliments so far!
Below is a picture of the supplies I used, obviously not shown but needed are small pliers (I had two pairs of needle nose pliers, round pliers and cutters to cut the wire) and some super glue (I used Gorilla brand super glue). Next to that is the final product!
Sunday, October 2, 2011
New Molds Can Be Hard to Get Used To!
I've been taking LOTS of custom orders lately, hence my lack of blog post updates! I had quite a large order for 12 of my dress form necklaces, then another 12 after that. Normally that would have been no problem except BOTH of my lovely, high quality dental grade silicone dress form molds (made by my dad; thanks dad!) decided to basically crumble as I was pulling the pieces out of the molds. Any mold will break down after a certain amount of uses and unfortunately, these molds chose the middle of my large order to break.
Now as I mentioned, the dental-grade silicone my dad had made my molds with is VERY expensive and he ran out of it, so I decided to try out Castin Craft's Silicone Mold Putty. The directions seem simple but the working time is VERY short, about 5 minutes, if that, so if you don't get the putty mixed quickly and press your item in it, you end up with a dried up, rubbery ball. I managed to mess up the first two so again, my dad helped me with making the molds and I used up all the material but I got four molds out of it.
I have to say, I'm not TOO happy with this material, it may be okay for clay pieces but with my Castin Craft epoxy resin, it creates bubbles all over the piece even if you let the resin sit and de-gas itself for a few minutes before pouring it.
It looks like this, you mix the purple and white until the color is uniform.
I Googled for a good hour and didn't find a thing about how to get rid of the bubbles other than not using a wooden stir stick as it introduces moisture (didn't help) or to pop the bubbles with a pin (only helpful for a few bubbles, not hundreds as I had in every piece).
I finally found something somewhere that suggested using baby powder or talc and powder the mold to get rid of some of the moisture in the material. It helped to an extent but not a whole lot. I did have some bubbles but at least the pieces no longer looked like a freshly poured glass of Sprite.
Final piece:
If you have any ideas or know of anything that works for sure for keeping bubbles out of pieces made in the Castin Craft Silicone Putty molds, please feel free to comment!
Friday, August 19, 2011
Huge Supplies Contest at Julie's Bits Blog!
Julie's Bits Blog has a huge contest going on until the end of August! She's giving away lots of great supplies such as what's shown in the picture below. Can't you just imagine all the fun things you can make with your winnings?
Photo above from Julie's Bits Blog
Here's the link to the contest, there are tons of easy ways to enter, good luck!!
http://juliesbits.blogspot.com/p/august-2011-huge-supplies-giveaway-over.html
Photo above from Julie's Bits Blog
Here's the link to the contest, there are tons of easy ways to enter, good luck!!
http://juliesbits.blogspot.com/p/august-2011-huge-supplies-giveaway-over.html
Wednesday, July 27, 2011
Saturday, July 23, 2011
Sprinkles Galore
Because I love all things sprinkled and delicious, I was taken by the blog theBERRY's post which includes 34 (!!!) pictures of sprinkle-y confections today.
Here's one of my favorites but let's not kid ourselves, I love so many of them it's hard to choose.
Click the picture below to be taken to the colorful, delectable post. Be prepared to crave something sweet afterwards!
Here's one of my favorites but let's not kid ourselves, I love so many of them it's hard to choose.
Click the picture below to be taken to the colorful, delectable post. Be prepared to crave something sweet afterwards!
Thursday, June 30, 2011
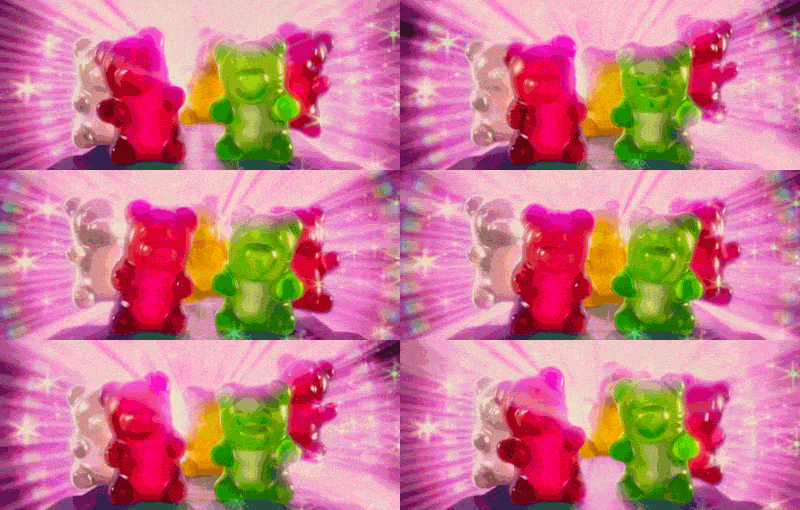
Dancing Gummi Bears!
Sometimes I find an adorable picture or something and want to post it somewhere. Way back when, I'd post it on Myspace (ah, memories) and my page was like a photo album of cute graphics. Nowadays, I don't have anywhere to post those things; facebook? No...especially since you can't see moving pictures and that's the whole point! I can't print them out...twitter? Nope.
Then I remember that I have a blog lol. So this is a really random post, but I wanted to share this adorable dancing gummi bear picture. I love all things candy and cute and this fits perfectly!
And the link for future reference:
http://picsauce.com/post/5946602506/gettin-jiggy-with-it
Then I remember that I have a blog lol. So this is a really random post, but I wanted to share this adorable dancing gummi bear picture. I love all things candy and cute and this fits perfectly!
And the link for future reference:
http://picsauce.com/post/5946602506/gettin-jiggy-with-it
Labels:
candy,
cute,
gif,
graphic,
gummi bear,
gummy bear,
sweet tooth,
sweets
Tuesday, June 21, 2011
Loving Google's Logo Again. It's Murakami!
I was introduced to Takashi Murakami's art because of the first Louis Vuitton collaboration in 2003 (the candy colored Multicolore line.) From there, I immediately liked the adorable Cherry Blossom line, Cerises (cherries), Panda and the elusive LV Hand logo that appeared on pieces exclusive to the MOCA exhibit in Los Angeles. So of course, I am loving the Google logo today, which features KaiKai and Kiki as well as lots of the adorable smiling flowers! Murakami does do more...shall we say...risque work (Hiropon is quite odd and makes me uncomfortable) and they have their own dedicated fans, as expected. But I'm into the adorable big-eyed characters like the ones on the logo today!
Here's the logo:
And to find out more information on Murakami, click the link below (site is available in English)!
http://www.kaikaikiki.co.jp/c-murakami
Here's the logo:
And to find out more information on Murakami, click the link below (site is available in English)!
http://www.kaikaikiki.co.jp/c-murakami
Labels:
art,
artwork,
cartoon,
characters,
google,
kawaii,
louis vuitton,
murakami
Friday, June 17, 2011
Skinny Cow Sweets...You'd Never Know They're Low Calorie!
I cannot, for the life of me, give up sweets! I've tried and I just can't, I get irritable and annoyed. Peanut buttery chocolate candies are my absolute favorite; I found some peanut butter chocolate truffles at Costco awhile back that are so insanely delicious, it has taken me a lot of restraint not to finish the container already.
So rather than eliminate sweets altogether, I either eat a favorite, regular treat and just limit my portions (i.e. one cupcake for the day, then no other sweets), or I have something low calorie yet still yummy, like a Skinny Cow product!
I've tried quite a few of the varieties, I particularly like the Chocolate Truffle Bars or the Chocolate Peanut Butter Ice Cream Sandwiches. And their new candy (Heavenly Crisps and Dreamy Clusters) is amazing as well. Basically, I haven't found a single treat that I don't like and I'm quite picky about how I want my sweets to taste (i.e., can't stand grocery store cupcakes around here, as the frosting is way too sweet.)
I think my only complaint, which I really had to think about for awhile because I couldn't come up with anything, is that the ice cream goodies are pricey. Around here, they're about $6 a box, so I try to get them when they're on sale, which is rare. But they're super yummy and taste like full-calorie treats!
Some of the ice cream treats:
And the new candies!:
Labels:
candy,
dessert,
diet,
ice cream,
low calorie,
skinny cow
Saturday, June 11, 2011
The Most Amazing My Little Pony Cakes!
When I need a laugh, I adore checking out the Cake Wrecks blog. With all the misspelled words (i.e. congradulations instead of congratulations) and just overall DUMB writing (i.e. actually writing "Happy Birthday with Sprinkles" on the cake rather than just writing Happy Birthday and putting actual sprinkles on the cake) it always makes me wonder if anyone proof reads anymore. Writing on a cake without checking what you're writing is like doing a crossword puzzle with a pen!
However, sometimes they take a break from the stupidity and showcase some absolutely amazing cakes. I'm always envious that people can do such amazing things with fondant and create such gorgeous cakes!
Recently, there was a post of some great 80's themed cakes and,because I love all things cute and still have a soft spot for MLP, my favorites by far were the My Little Pony cakes. I'm just in awe of these, especially the standing pony!
Cake below was created by: Courtney's Cakes
Cake below was created by: London Cake
To see these and other amazing cakes in the 80's theme, please see the Cake Wrecks website!: http://cakewrecks.blogspot.com/2011/06/sunday-sweets-back-to-80s.html
Friday, May 20, 2011
New Banner and Logo provided by Onyx Design Factory!
I wanted to share my brand new banner (seen on my blog and on my Etsy shop), done by Shannon at Onyx Design Factory/frecklefoxboutique! I love how it turned out, especially the little starbursts on the letters. And of course, it's pink, definitely perfect for me!
She's just getting her Onyx Design Factory site set up and will have lots more examples up soon. For your own graphic design needs, you can visit either one of her sites and get a price list as well. She's a sweetie to work with so don't hesitate to email her if you would like something for your own site!
Onyx Design Factory:
http://onyxdesignfactory.tumblr.com/
frecklefoxboutique (for her fun wine glasses, flip flops, ornaments and more!)
http://www.frecklefoxboutique.com/
Saturday, April 30, 2011
Favorite Feel-Good Movies?
There are some times when I'm feeling down or just blah and need a pick-me-up. I have a few favorite movies that I can just watch over and over again and will always feel better! A common theme I notice that I really seem to enjoy is when I can root for the underdog; I'm always happy when that person comes out on top over the rude jerks they encounter. Below are some of my favorite movies, what are some of yours? I'm always looking for suggestions!
-Legally Blonde 1 and 2- I enjoy the whole "Ha! You didn't believe in me but look what I did!" feeling of these movies. It may be a bit over-the-top and unbelivable but it's still fun to watch Elle (Reese Witherspoon) succeed. And the fashion and accessory lover in me is crazy about the fun things Elle wears in the movies. Both movies are just. So. Pink! Favorite item? That sparkly rainbow pastel scarf she wears in the second movie. I searched all over for a scarf like that, now I have one just like it and a bunch more in all colors!
-Mean Girls- Not to be confused with Mean Girls 2, which, in my opinion was a dud as this movie needed no sequel!
I really enjoyed Lindsay here, playing Cady Heron, before she went off the rails. After seeing this movie in the theater, I went crazy buying fun accessories in candy colors as well as the incredibly flattering Splendid brand thermals like Cady wore. Plus, the eye candy in the form of Aaron Samuels (Jonathan Bennett) doesn't hurt, either.
"Four for you, Glen Coco, you go, Glen Coco!" If you've seen the movie, you'll know that line...if not...watch the movie and you will!
-House Bunny- A fluffy movie about a girl named Shelly (Anna Faris) who gets kicked out of the Playboy Mansion for being too old. She just turned 27; which is apparently "59 in Bunny years." She has no experience in doing anything else so she ends up taking over as house mother for a dweeby sorority of unpopular girls. Of course, it's pretty predictable as she turns the sorority into one all the girls, even the popular ones, want to belong to.
I was never popular in high school so I appreciate the turn in this movie! Plus, Anna Faris and Emma Stone are too cute, as usual.
-The Wedding Singer- Aw, Robbie Hart (Adam Sandler.) Such a simple movie but so cute. You have to root for Robbie to win Julia's (Drew Barrymore) heart after she is set to marry that no-good cheater Glen. And who really wants to be Mrs. Julia Gulia anyway?
-13 Going on 30- Another movie where I died and went to heaven looking at the clothes and accessories! Plus, it's set in the 80's and, being a baby of the 80's, I obviously don't remember anything about them so it's fun being transported back to that decade. Another far-fetched idea to believe that Magic Wishing Dust could grant your wish, like what happens to Jenna (Jennifer Garner) but I think the whole do-over is so sweet. Plus, Matty (Marc Ruffalo) is adorable in this movie.
I rarely tear up at movies, but the end always gets me.
Labels:
comedies,
feel-good movies,
fun,
movie suggestions,
movies,
romantic comedies
Wednesday, April 20, 2011
Katy Perry Concert? Okay!
A friend has been wanting to go the Katy Perry concert, her sisters are going but when they offered her tickets awhile back, she didn't want to go. Well, she changed her mind and needed a companion, so I'll be going! I'm not a huge fan but I know it'll be fun seeing all of Katy's costume changes. All the crazy cute food clothing and accessories she has worn are things I'd love to wear but don't have the guts to do it!
The concert isn't until August but I know I'll have fun figuring out what to wear myself. I'll definitely be making some jewelry pieces, obviously something fun with sprinkles inside!
I was looking around on ebay for different ideas and came across this seller with this adorable costume! If I had the nerve and some money to blow, I would SO wear this because it's too cute.
If you want to purchase it yourself, just follow the link!
http://cgi.ebay.com/WOW-Katy-Perry-California-Gurls-Candy-Dress-Costume-/150593663922?pt=UK_Women_s_Dresses&hash=item231014f3b2
Sunday, April 3, 2011
Google's Ice Cream Logo- Love!
Monday, February 14, 2011
Santa Claw Update!
I said I would update when I got my prize in the mail (see my previous blog post: Santa Claw, World's Largest Claw Machine) and as promised, I'm updating! I got the envelope decorated all nicely with fun stickers and a label advertising where it's from.
Here's the envelope:
And the yellow bouncy ball I grabbed out of the machine when I played! Of course, it was deflated so I had to blow it up; I can't wait to use it in the pool this Summer.
Here's the label that was on the package, along with the little certificate inside!
Some may not be so excited by this but I love my bouncy ball, I never win anything from claw machines, so this is my first win ever!
Labels:
claw game,
claw machine,
prize,
real art group,
santa claw
Sunday, February 13, 2011
Pre-Valentine's Day Blog Hop!
I just joined the Monday/Valentine's Day blog hop hosted by Tara at Give it to me Tara and Just Married with Coupons blogs! Click below to enter your blog in the blog hop!
Friday, January 21, 2011
Santa Claw, World's Largest Claw Machine!
I like to think I'm ahead of things and find out about awesome new stuff before other people do. Apparently I dropped the ball on this one. No pun intended and you'll see why!
I was bored, surfing around some blog posts and I found this one from GemCityTiffany, which interested me greatly; a post about the WORLD'S largest claw machine!
Read her post for some great background info and pictures!:
http://gemcitytiffany.wordpress.com/2011/01/06/what-is-the-santa-claw/
So of course, I had to try it myself! The wait times are really long, each time I've been on, the wait time was about 6 or 7 hours, so I would sign on and go about my day. I played unsuccessfully twice, didn't even get close to grabbing anything, then I lost my turn a couple of times because I forgot about it and came back to the computer too late, oops.
So this afternoon I signed back on and just got to play a few minutes ago, let the live feed show (yes, you can watch people as they're playing, it's kind of addicting!) and looked around for which one I wanted to try to grab. Well, the weird thing is that the camera view you see while in line isn't the camera you see when you're playing; instead, you see a view straight down from the claw and another from the side of the machine. It's kind of hard to get your bearings the first couple of times.
But tonight, I centered the claw over one of the larger yellow balls, grabbed, the claw got it and...it got all the way to the area where it drops it down the chute and it bounced off the side and back into the machine. I thought for sure I lost yet again.
Then a video played and it gave me a congratulations message showing that I won!! I was so amazed that they counted that as a win!
Anyway, I will update with the prize that I get (probably a fun bouncy ball!), it should show up in about 2 or 3 weeks. You only get one prize no matter how many times you win and you can only receive your prize if you live within the U.S., but you can play as much as you want!
Go here to play and good luck!:
http://www.thesantaclaw.com/
Photo via thelaughingsquid:
Labels:
claw machine,
fun,
games,
real art group,
santa claw
Monday, January 10, 2011
Making of...JRandall Resin Necklaces!
Being a JRandall fan, I wanted to make something for myself and other fans to help spread the word about JRan! Naturally, I figured a resin jewelry piece. I really need to get another mold because these take FOREVER as I only have one square mold and can only do one at a time. Once you see the steps, you'll see why this is frustrating. So, next step for me is to get another mold! The steps below can be used for any paper item you want to preserve in resin.
Step 1- Find pictures you want to preserve in resin. (Since these are printouts on computer paper, I gave them a little more thickness by gluing them to cardstock first.) Coat the pictures, back and front with at LEAST 2 coats of Modge Podge. I did the first two coats, then cut out the pictures, then did the backs and the edges.
Step 2- Mix your resin according to the instructions. I use epoxy resin, so I mix equal parts of resin and hardener. Fill mold just enough to hold the picture in, then place picture in and gently push down to force out any air bubbles. It looks goofy but I have the stir stick anchored to hold the picture down until the resin has thickened enough and I don't need to worry about air bubbles anymore (usually about 4 hours.)
Step 3- Wait...and wait...and wait until the resin cures. If it was mixed properly, you can usually feel that the piece is solid the next morning, but wait at least 24 hours to be sure that it really is cured.
Step 4- I wanted to use a solid colored back but didn't want to wait another 24 hours for the second layer, so I mixed my quick-cure Alumilite polyurethane resin (again, equal parts A and B), with a bit of shimmery white powdered color (I use powdered eyeshadow, works perfectly!) and quickly poured into the rest of the mold. This resin sets up FAST so you have to work FAST. The fun part of Alumilite is that it cures completely opaque and pastel colored depending on the powdered pigment you add to it.
In 10 minutes, the piece is ready to pop out! After that, I superglued a bail to the back and here is the finished piece!
Subscribe to:
Posts (Atom)